Abstract
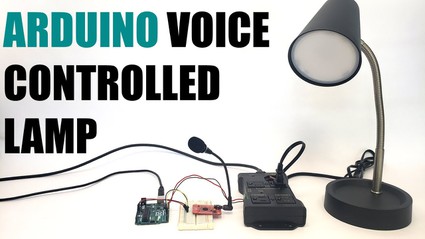
"Alexa, turn on the lights!" Sometimes it is easy to take the technology around us for granted. But have you ever wondered how a smart speaker like an Amazon Echo® knows what you are saying and how it can control lights and appliances in your home? It can seem like magic if you buy a device that just works when you open the box. In this project, you will learn how it works. You will build your own smart home device to control an appliance with voice commands using an Arduino®. Get started creating your own smart home!
Summary
Previous experience with an Arduino is recommended.
A kit is available from our partner Home Science Tools. See the Materials section for details.
Do not cut or solder high-voltage wires (like the power cord for a lamp).
Note (April 15th, 2024): we have received multiple user reports of the Elechouse voice recognition module not working properly. If you have already purchased one, we recommend contacting the seller for a refund or replacement. Otherwise, we recommend using one of the other modules listed in the Materials section.
Objective
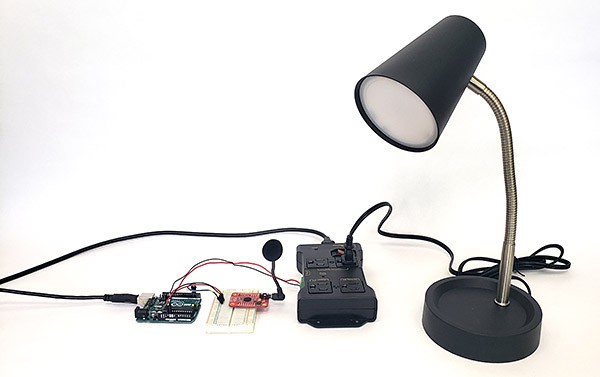
Build a device that lets you use voice commands to control one or more household appliances.
Introduction
Traditionally, most lights and household appliances have been controlled by manual switches and buttons. Today, though, many newer devices connect to the Internet, and they can be controlled from your phone or computer. These Internet-connected devices, sometimes called smart home devices, are part of the Internet of things (IoT), a network of devices other than traditional computers that are connected to the Internet and exchange data with each other.
Smart speakers like the Amazon Echo® (Figure 1) allow you to use voice commands to communicate with a virtual assistant like Apple's Siri®, Amazon's Alexa®, Microsoft's Cortana®, or Google®. You can use them to search the web, to play music, and even to control lights and appliances. These smart speakers use speech recognition to recognize the words that you say and convert them into commands that a computer can follow. This process is also called speech to text (STT), which is the opposite of text to speech (TTS), the process used by screen readers and virtual assistants to read text on a computer screen out loud.
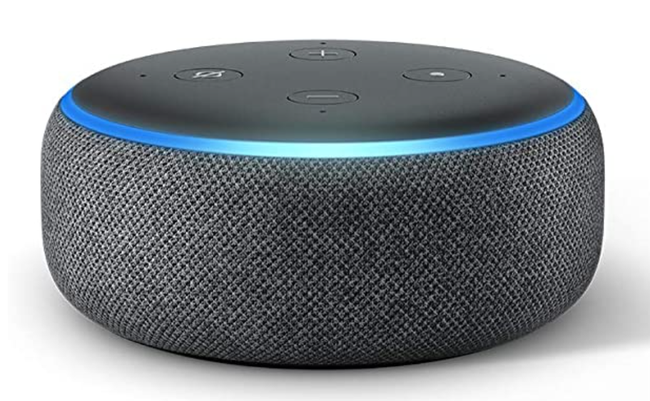 Image Credit: Ben Finio, Science Buddies / Science Buddies
Figure 1. An Amazon Echo, a type of smart speaker.
You might also hear speech recognition referred to as voice recognition. The terms are sometimes used interchangeably, although technically speech recognition refers to the process of recognizing spoken words regardless of who is speaking them, and voice recognition refers to recognizing the voice of a specific person. Speech recognition is useful for speaker-independent commands, like controlling the lights in a household with multiple people. Voice recognition is useful for speaker-dependent actions, like using your voice to unlock a phone or computer.
Many smart speakers require a wake word, like "Alexa" or "Computer." This "wakes up" the speaker and tells it to listen for an additional command. It then sends a recording of what you say next over the Internet to a company like Apple or Google, where the information is processed and converted to text. This text is then converted to a command or an action for the program to take, like searching the web for something, playing a song, or turning on an appliance. Since these large companies have huge networks of smart speakers, phones, and computers all over the world, they can collect large amounts of data and use machine learning to improve their speech recognition. For example, they can train their speech recognition programs to work for people with different accents.
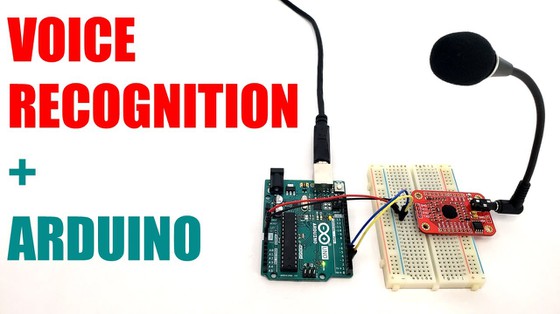
You might not have all the computing resources of Google at your disposal, but you can still use a popular prototyping platform like an Arduino to build your own smart home device. There are many third-party voice control modules available for the Arduino. These modules allow local processing of a limited set of voice commands without requiring an Internet connection. This lets you build a device where your voice acts as the input and an electrical signal to control an appliance is the output. The Procedure section of this project will show you how to use an Arduino to control one or more appliances using voice commands. You will need to make some design choices and use the engineering design process to design your voice control system.
Terms and Concepts
- Smart home device
- Internet of Things (IoT)
- Smart speaker
- Voice command
- Virtual assistant
- Speech recognition
- Speech to text (STT)
- Text to speech (TTS)
- Voice recognition
- Speaker-independent
- Speaker-dependent
- Wake word
- Machine learning
- Input
- Output
- Engineering design process
- Direct current (DC)
- Alternating current (AC)
Questions
- Have you ever used a virtual assistant like Siri or Alexa on a phone or other device? What did you use it for?
- Have you ever used a smart speaker like Amazon Echo or Apple HomePod®? What did you use it for?
- How do virtual assistants or smart speakers process your voice commands?
- If you could control any appliance in your house with your voice, which one would it be?
Bibliography
- Lutkevich, B. (n.d.). Speech Recognition. TechTarget. Retrieved July 5, 2022.
- Woodford, C. (2021, August 29). Speech recognition software. ExplainThatStuff. Retrieved July 5, 2022.
- Science Buddies (n.d.). Engineering Design Process. Science Buddies. Retrieved July 1, 2022.
- Eglowstein, H. (n.d.). How to Use an Arduino. Science Buddies. Retrieved July 1, 2022.
Materials and Equipment 
Recommended Project Supplies

This is an engineering design project. The following is a list of materials to get you started, but you may need additional parts depending on which speech recognition platform you decide to use and what you want to control with your Arduino.
- Science Buddies Electronics Kit for Arduino, available from our partner Home Science Tools. You will need these items from the kit:
- Arduino-compatible microcontroller board
- USB cable
- Breadboard
- Jumper wires
- You will also need to gather these items, not included in the kit:
- Speech recognition module for Arduino. There are many third-party add-ons for speech recognition with the Arduino available from different vendors. This project contains instructions for the Elechouse Voice Recognition Module V3 (note, April 2024: users have been reporting issues with the Elechouse module, we recommend using a different one; also available on Amazon under different brand names such as Rakstore) and the Grove Speech Recognizer. There are other options such as the EasyVR 3 Plus Shield or the MOVI Speech Recognizer. See Procedure section for more information about choosing a speech recognition module.
- Iot Relay. You will need more than one if you would like to control multiple appliances separately. This item is may also be available from other vendors like SparkFun and Adafruit.
- One or more appliances that plug into a wall outlet, such as a lamp or fan
- Windows or Mac computer. Unfortunately, Arduino software does not currently work well with Chromebooks. Your computer will need:
- Access to the Arduino IDE, either installed local version or web-based editor. Watch this video for a comparison of the two options.
- USB port. The Science Buddies kit comes with a USB-A to B cable. The "B" end plugs into the Arduino and the "A" end plugs into your computer. You will need an adapter or different cable if your computer only has USB-C ports. Watch this video to learn about the different types of cables and adapters.
- Lab notebook
Disclaimer: Science Buddies participates in affiliate programs with Home Science Tools, Amazon.com, Carolina Biological, and Jameco Electronics. Proceeds from the affiliate programs help support Science Buddies, a 501(c)(3) public charity, and keep our resources free for everyone. Our top priority is student learning. If you have any comments (positive or negative) related to purchases you've made for science projects from recommendations on our site, please let us know. Write to us at scibuddy@sciencebuddies.org.
Experimental Procedure
Planning Your Voice Control System
Before you buy parts for your project, you will need to decide what appliance(s) you want to control, and how you want to control it. For example:
- Will you control more than one appliance? What commands do you want to use? For example, if you are controlling a single lamp, the words "on" and "off" are probably sufficient. If you want to control multiple appliances independently, you may need different commands, such as "turn on the light" and "turn on the fan."
- Do you want your voice control system to respond to everyone (speaker-independent) or only to you (speaker-dependent)?
- Where will your appliance, Arduino, and microphone be located? For example, do you want to be able to walk into a room and use your voice to turn on a floor lamp that is across the room? Will you control a desk lamp while sitting at the desk?
- What is your budget? Some of the modules are more expensive than others.
- Is there potential for background noise?
You can always modify your plan later, but make sure you know what you want to do before you start buying parts.
Choosing a Speech Recognition Module
Based on your plan for your voice control system, you will need to choose a speech recognition module for your Arduino. There are many third-party modules available with different features. You can read about the features of each module on its website. (See the Materials section for examples). Before buying one, consider the following:
- Some modules come unassembled and require soldering to attach header pins. If you do not have access to a soldering iron, make sure you purchase a module that does not require soldering.
- Some modules come with built-in commands that you do not need to train.
- Some modules allow you to train new commands and some do not.
- Some modules are speaker-dependent and some allow speaker-independent commands.
- Different modules can store different numbers of commands of varying length. For example, some may allow you to record full sentences, while others may only allow commands that are a second or two long.
- Some modules have an on-board microphone, while other modules have a connector for an external microphone.
Determine what features you need for your voice control system based on your plan. For example, if you want the system to work for everyone in your family, a speaker-independent module may be better. (If you use a speaker-dependent module, you will need to train each command separately for each person.) Some of the microphones that are built into or come with the speech recognition modules have a fairly short range. They may only work well when you are very close to them. That could be fine if you will use the device while sitting at a desk. If you prefer to be able to control an appliance from across the room or from different directions, a module that lets you connect a higher-quality or omnidirectional external microphone may be better.
There is no single "right answer" for which speech recognition module to buy. They all have different features and different prices. Which one is "best" for your project will depend on your criteria and constraints. Choosing one is part of the engineering design process.
The following two sections contain instructions for using the Elechouse Voice Recognition Module V3, which allows you to train multiple speaker-dependent commands, and the Grove Speech Recognizer, which comes pre-loaded with 22 speaker-independent commands but does not let you train new commands. If you choose another speech recognition module, you will need to follow the instructions for the module you purchase.
Using the Elechouse Voice Recognition Module V3
Watch this video for an overview of how to set up and use the Elechouse Module V3, or follow the written steps below.
- Solder header pins to the GND, VCC, RXD, and TXD pins.
- Plug the microphone into the microphone jack.
- Plug the header pins into a breadboard. Alternatively, you can use male-female (M-F) jumper wires to connect the module directly to the Arduino without using a breadboard.
- Use jumper wires to make the following connections to the Arduino (Figure 2).
- Elechouse GND to Arduino GND
- Elechouse VCC to Arduino 5V
- Elechouse RXD to Arduino digital pin 3
- Elechouse TXD to Arduino digital pin 2
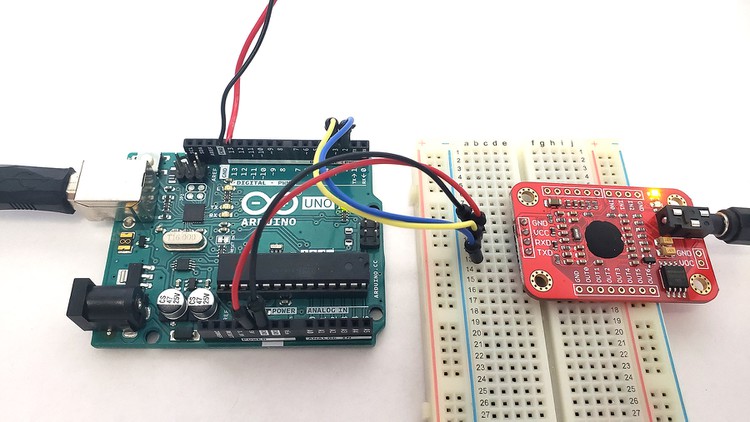 Image Credit: Ben Finio, Science Buddies / Science Buddies
Figure 2. Elechouse Voice Recognition Module V3 connected to an Arduino UNO. - Download the Arduino library from the Elechouse website.
- Extract the .zip folder to the Arduino libraries folder on your computer. This folder may be saved in a location such as C:\Program Files (x86)\Arduino\libraries.
- Connect your Arduino to your computer and open the Arduino Integrated Development Environment (IDE).
- Select File > Examples > VoiceRecognitionV3 > vr_sample_train.
- Under Tools, make sure you have the correct Arduino board and COM port selected.
- Upload the program to your Arduino.
- Select Tools > Serial monitor.
- Set the baud rate to 115200.
- Type "train 0" in the box at the top of the serial monitor and press Enter.
- Watch the serial monitor. When it prints "speak now," say "On" clearly.
- When it prints "speak again," say "On" again.
- If the two recordings do not match, the program will continue prompting you to speak. Keep repeating the phrase until it prints "success."
- Enter "train 1" then repeat steps 14–16 for the word "Off."
- Enter the command "load 0 1". This loads the two commands you just recorded into memory for use with voice control.
- Try saying "On" or "Off." The serial monitor should print out "VR Index," followed by the index number of the matching command (0 for "On" and 1 for "Off"). If it does not print anything, make sure you are speaking clearly and at the same distance from the microphone as when you recorded the command.
- Select File > Examples > VoiceRecognitionV3 > vr_sample_control_led. Upload the program to your Arduino.
- Try speaking the words "On" and "Off" to control the Arduino's onboard LED (the small LED labeled "L" near Arduino pin 13).
- You can now use your voice recognition module to control a single appliance by connecting pin 13 to the IoT relay.
- To control multiple appliances, you will need to train additional command words following the procedure above and modify the vr_sample_control_led program to control additional Arduino pins.
Using the Grove Speech Recognizer
Watch this video for an overview of how to set up and use the Grove Speech Recognizer, or follow the written steps below.
- Plug the included cable into the 4-pin header on the Grove Speech Recognizer board.
- Use jumper wires to connect the wires in the cable to your Arduino (Figure 3):
- Black wire to Arduino GND
- Red wire to Arduino 5V
- Yellow wire to Arduino pin 2
- White wire to Arduino pin 3
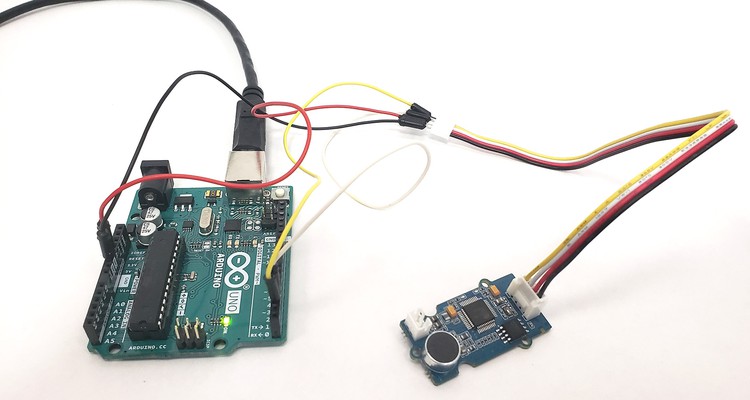 Image Credit: Ben Finio, Science Buddies / Science Buddies
Figure 3. Grove Speech Recognizer board connected to the Arduino. - Go to the Seeed Studio wiki page, scroll down, copy the example code, and paste it into your Arduino IDE.
- Under Tools, make sure you have the correct Arduino board and COM port selected.
- Upload the program to your Arduino.
- Select Tools > Serial monitor.
- Set the baud rate to 9600.
- Say the wake word "hicell" (the words "hi" and "cell" pronounced together as one word). The red LED on the board should light up when it recognizes the wake word, indicating that the board is waiting for a command.
- Once the red LED is lit up, speak one of the command words or phrases. There are 22 commands listed in the example program — for example, "Start" and "Stop." If the board recognizes the command, the blue LED should light up and it will print the command to the serial monitor.
- Download FILE grove_control_LED.ino and upload it to your Arduino. This is a slightly modified version of the example code that uses the commands "Turn on the light" and "Turn off the light" to control the Arduino's onboard LED.
- Try saying the wake word followed by "Turn on the light." The Arduino's onboard LED (the one labeled "L" near pin 13) should turn on. Then say the wake word followed by "Turn off the light" and the LED should turn off. Remember that you need to say the wake word again for each new command. If it does not work, make sure you are close to the microphone and speaking clearly, then try again.
- You can now use the speech recognizer to control a single appliance by connecting pin 13 to the IoT relay.
- To control multiple appliances, you will need to further modify the code as shown in grove_control_LED.ino to make use of additional commands and other Arduino pins.
Using the IoT Relay
Caution:The IoT relay allows you to safely control a high-voltage appliance that plugs into a wall outlet using a low-voltage control signal from a microcontroller like the Arduino. Remember that you should never cut or modify the high-voltage wires (like the power cord for an appliance) directly.
Watch this video or follow the written instructions below to learn how to set up and use the IoT relay:

- Pull the green screw terminal connector out from the side of the IoT relay.
- Loosen the screws, insert one end of a jumper wire into each terminal, then re-tighten the screws.
- Connect the "+" wire to Arduino pin 13 and the "-" wire to GND. (See Figure 4.)
- Make sure the power switch on the IoT relay is in the Off position.
- Plug an appliance, like a lamp, into one of the "normally off" outlets on the IoT relay.
- Upload the Blink example code to your Arduino (File > Examples > 01.Basics > Blink).
- Turn on the power switch on the IoT relay. Your appliance should turn on and off repeatedly.
- Turn off the power switch on the IoT relay.
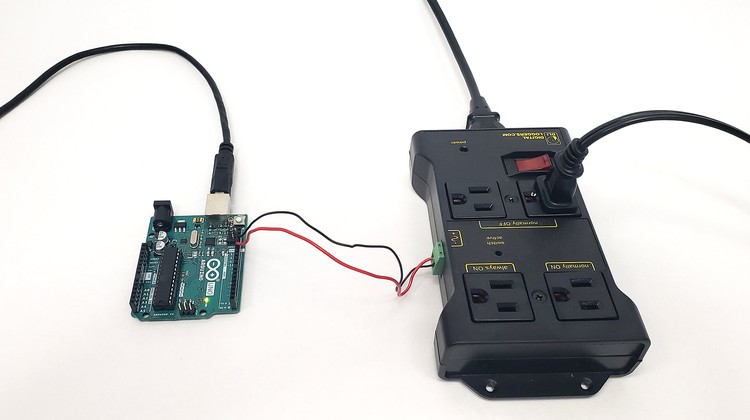 Image Credit: Ben Finio, Science Buddies / Science Buddies
Figure 4. IoT relay connected to the Arduino with jumper wires.
Build Your Smart Home Device
Using the information in the sections above, you should now be ready to set up your own voice-controlled smart home appliance.
- Set up your voice recognition module. You can follow the instructions in one of the sections above, or follow the instructions that came with your module if you purchased a different one.
- Test your voice commands and use them to control the Arduino's onboard LED so you can confirm that they are working.
- Connect your Arduino to the IoT relay and plug in an external appliance so you can switch it on and off.
- Depending on what you want your project to do, test it in different scenarios. For example, do the voice commands work for everyone in your household? Do they work from across the room or if there is background noise?
- Look at your test results and decide if your solution meets all your design requirements. If not, what can you do to improve it? Do you need to re-train any of the commands or move the microphone to improve performance? Do you need to revisit the requirements to get the results you envisioned?
- Keep track of all your test results and make notes on any changes so you can communicate your work to others.
Ask an Expert
Global Connections
The United Nations Sustainable Development Goals (UNSDGs) are a blueprint to achieve a better and more sustainable future for all.

Variations
- Can you use your Arduino to control motors and use voice commands to make something move?
- If you search online, you will find many Arduino projects that use a Bluetooth module to connect an Arduino to a phone. Can you use your phone to control an appliance instead of (or in addition to) your voice?
- Can you build a voice-activated robot?
- How reliable is your voice recognition module? Do a project using the scientific method instead of the engineering design process. For example, pick a single command and repeat it 10 times at different distances from the microphone.
Careers
If you like this project, you might enjoy exploring these related careers:


Contact Us
If you have purchased a kit for this project from Science Buddies, we are pleased to answer your questions.In your email, please follow these instructions:
- What is your Science Buddies kit order number?
- Please describe how you need help as thoroughly as possible:
Examples
Good Question I'm trying to do Experimental Procedure step #5, "Scrape the insulation from the wire. . ." How do I know when I've scraped enough?
Good Question I'm at Experimental Procedure step #7, "Move the magnet back and forth . . ." and the LED is not lighting up.
Bad Question I don't understand the instructions. Help!
Good Question I am purchasing my materials. Can I substitute a 1N34 diode for the 1N25 diode called for in the material list?
Bad Question Can I use a different part?
Contact Us
Related Links
- Science Fair Project Guide
- Other Ideas Like This
- Electricity & Electronics Project Ideas
- My Favorites