Summary
Introduction
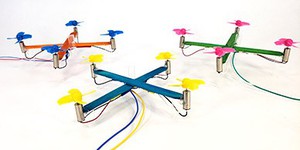
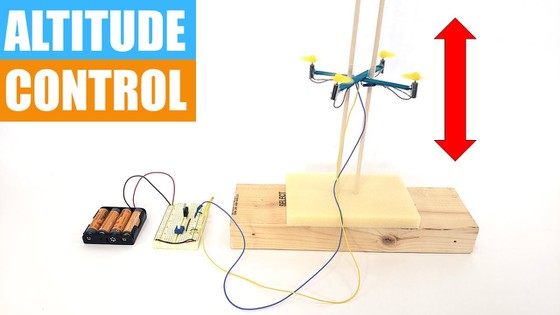
How do you make a drone fly up and down? In this activity, you will build a simple circuit to control the altitude of a popsicle stick drone.
See this page for a complete list of our mini drone projects. You may wish to do the projects in order.
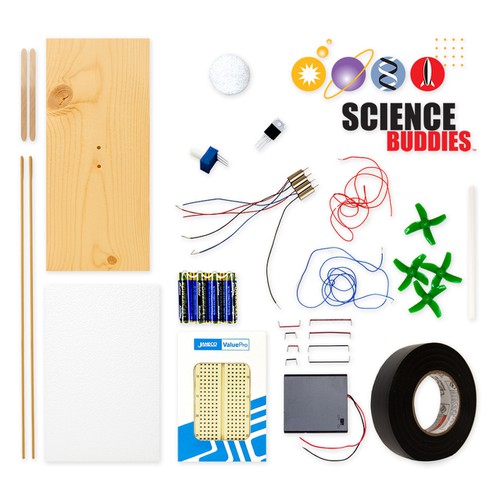
Materials
Disclaimer: Science Buddies participates in affiliate programs with Home Science Tools, Amazon.com, Carolina Biological, and Jameco Electronics. Proceeds from the affiliate programs help support Science Buddies, a 501(c)(3) public charity, and keep our resources free for everyone. Our top priority is student learning. If you have any comments (positive or negative) related to purchases you've made for science projects from recommendations on our site, please let us know. Write to us at scibuddy@sciencebuddies.org.
Prep Work
- Follow the instructions in the DIY Mini Drone activity to build your drone.
- If you do not know how to use a breadboard, refer to our Breadboard Tutorial before you continue.
Instructions
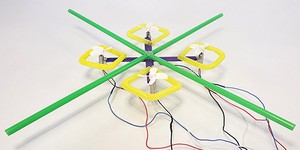
- After following the instructions in the DIY Mini Drone activity, your drone should look like this.
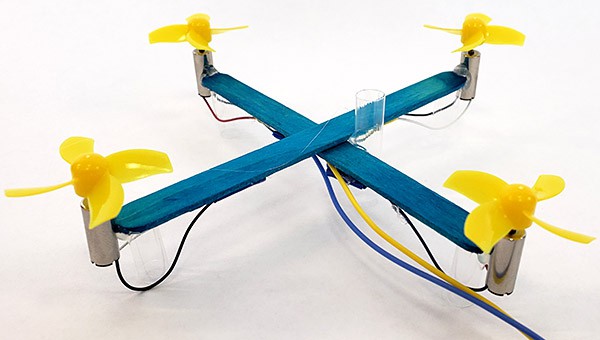 Image Credit: Ben Finio, Science Buddies / Science Buddies
- Glue a second vertical piece of straw to the middle of your drone's frame, opposite the first piece.
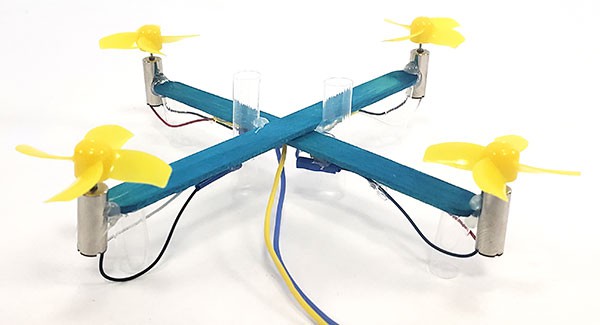 Image Credit: Ben Finio, Science Buddies / Science Buddies
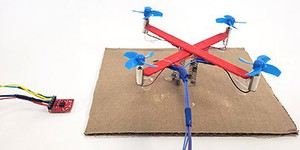
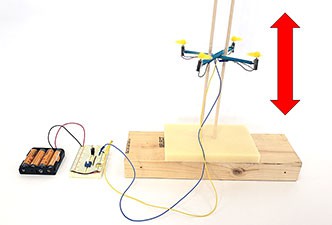
- Build a support for your drone with two dowels spaced apart so they fit through both straws. It is important to make sure the dowels are parallel or your drone will get stuck. Make sure the drone slides smoothly up and down the dowels. Optional: Place a piece of foam at the base of the dowels. This will provide some padding if your drone falls.
- Alternatively, you can use two strings. Tape the strings to a shelf or the edge of a table, and let them hang down. Thread the drone onto the strings, and then make sure the strings are pulled taut (for example, by taping heavy weights to ends of the strings, or having a helper hold them).
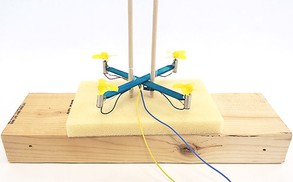 Image Credit: Ben Finio, Science Buddies / Science Buddies
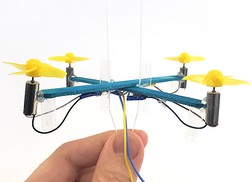 Image Credit: Ben Finio, Science Buddies / Science Buddies
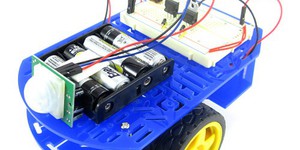
- Orient the breadboard so it is facing you with the writing upright. Then, connect all of the following:
- MOSFET (the black part with three legs and a large metal tab) in holes F11, F12, and F13, with the tab facing to the left.
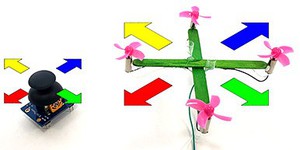
- Potentiometer (the blue rectangular part with a white knob) in holes F22, F23, and F24.
- Jumper wire from J11 to the ground bus (blue line).
- Jumper wire from H13 to H23.
- Jumper wire from J22 to the positive bus (red line).
- Jumper wire from J24 to the ground bus (blue line).
- Jumper wire connecting the left and right ground buses (blue lines).
- Jumper wire connecting the left and right positive buses (red lines).
- Battery pack positive (red) wire to the positive bus (red line).
- Battery pack negative (black) wire to the ground bus (blue line).
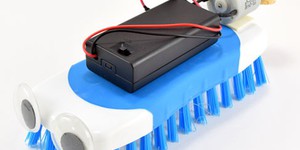
- Put the batteries in the battery pack.
 Image Credit: Ben Finio, Science Buddies / Science Buddies
- Turn the potentiometer all the way counter-clockwise. This is the "off" position. It will prevent your drone from turning on immediately when you connect it to the circuit.
- Connect your drone's power wires to short pieces of jumper wire so you can connect them to the breadboard (the drone's wires are too flexible to push into the breadboard on their own). Tightly twist the ends of the wires together to connect them, then wrap them in electrical tape.
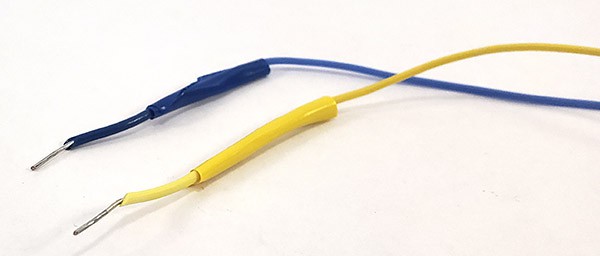 Image Credit: Ben Finio, Science Buddies / Science Buddies
- Plug the drone's positive wire (the one connected to the red and white motor wires) into the breadboard's positive bus, and the negative wire (the one connected to the black and blue motor wires) into hole J12.
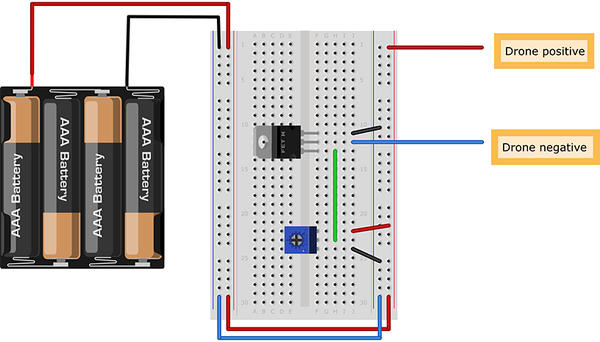 Image Credit: Ben Finio, Science Buddies / Science Buddies
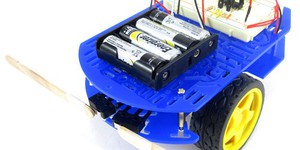
- Thread your drone onto the wooden dowels through the straws.
- Slowly start to turn the potentiometer's knob clockwise. Continue turning the knob slowly until your drone lifts off.
- If your propellers do not spin at all, even after you have turned the knob all the way clockwise, go back to step 4 and double-check your wiring. A single misplaced wire can prevent the entire circuit from working properly.
 Image Credit: Ben Finio, Science Buddies / Science Buddies
- Try adjusting the knob to control your drone's height.
 How far do you need to turn the knob to make the drone fly up?
Can you make the drone hover in place?
Can you make the drone land gently instead of crashing down?
How far do you need to turn the knob to make the drone fly up?
Can you make the drone hover in place?
Can you make the drone land gently instead of crashing down?
Cleanup
What Happened?
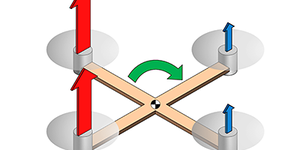
When you slowly turn the potentiometer's knob, electrical current starts to flow through the drone's motors. Initially, there is too much internal friction in the motors, so they do not spin at all. As you continue to turn the knob, more current flows through the motors, causing them to spin. The spinning propellers generate lift. However, at first, they spin very slowly. They do not generate enough lift to overcome the drone's weight, and the drone remains on the ground. As more and more current flows through the motors, they start spinning faster and the propellers generate more lift. Eventually, they generate enough lift to overcome the drone's weight, and the drone will lift off. When the drone is in the air, you can control the speed of the motors (and therefore the lift) by adjusting the knob, making the drone fly up and down. You may be able to find a setting that is "just right" to get the drone to hover in place, although this can be difficult. The drone might drift up or down slowly.
Digging Deeper
The original DIY Mini Drone project has no control circuit. The drone is connected directly to a battery pack that can be either on or off. This means the motors can only be off or spinning at full speed. This causes the drone to rapidly fly off the top of the guide pole unless you quickly turn the battery pack off.
The circuit you built in this project uses two main parts: a transistor* and a potentiometer. Working together, these parts act like an electronic "valve" to control the amount of electrical current flowing through the motors, similar to how adjusting the valve on a garden hose controls the amount of water flow. The more current that flows through a motor, the faster it spins. The faster a propeller spins, the more lift it generates. You can, therefore, use the circuit to control the amount of lift generated by the propellers. When the lift is greater than the drone's weight, the drone will accelerate upward. When the lift is less than the drone's weight, the drone will accelerate downward. Note that there is also another force present: friction between the wooden dowels and the straws. This can occasionally cause the drone to get "stuck" even if the lift is not exactly equal to the drone's weight.
In this project, you adjusted the control circuit manually. While most real drones have human operators, they also have electronic sensors and on-board computers that can automatically control the speed of the motors in order to steer. For example, this can allow the drone to automatically hover at a fixed distance above the ground, even in response to wind gusts. The next project in this series will show you how to add electronic sensors and automatic control to your drone.
* There are many different types of transistors. The type you used in this project is called a metal-oxide-semiconductor field-effect transistor, or MOSFET for short.
Ask an Expert
For Further Exploration
- Try adding small weights, like pennies, to your drone. How much weight can it lift?
- Use a multimeter to measure the amount of current flowing through your drone's motors. How much current does it take for the drone to lift off? To hover? How does the battery voltage change when the drone starts flying?