Summary
Introduction
Around the globe, many holidays, like Lunar New Year, Diwali, and St. Martin's Day, are celebrated with paper lanterns. Making a paper lantern can be a fun and creative project that combines art and engineering. What will your paper lantern look like?
Materials
Lanterns can be made from many different materials. Be creative and use materials you have easy access to, including items from the recycling bin. Here are a few suggestions to get you started:
- A battery-operated tea light or the DIY Night-Light Kit, available from our partner Home Science Tools. The kit includes all the electronics you need to build a simple lantern circuit that will turn on automatically in the dark:
- Mini breadboard
- Transistor
- Photoresistor
- Potentiometer
- 3/4 inch jumper wire
- 30 Ω resistor
- 2xAAA battery holder
- AAA batteries (4)
- Super bright LEDs in assorted colors (3)
- Items to form the body of your lantern (cardstock, construction paper, cardboard, a plastic bottle, wax paper etc.)
- Craft supplies to decorate your lantern (construction paper, markers, cellophane, tissue paper etc.)
- Something to hang your lantern (string, a stick, pipe cleaners etc.)
- Tools to build with (glue, tape, pencil, scissors etc.)
Disclaimer: Science Buddies participates in affiliate programs with Home Science Tools, Amazon.com, Carolina Biological, and Jameco Electronics. Proceeds from the affiliate programs help support Science Buddies, a 501(c)(3) public charity, and keep our resources free for everyone. Our top priority is student learning. If you have any comments (positive or negative) related to purchases you've made for science projects from recommendations on our site, please let us know. Write to us at scibuddy@sciencebuddies.org.
Instructions
- Think about the design criteria for your paper lantern. The design criteria are the things your lantern must have. For example:
- A light
- A body that surrounds and holds the electronics for the light
- A way for the light to shine out
- A way to display the lantern, like holding it by a handle, carrying it on a stick, resting it on the ground, or hanging it from a tree
- Sketch what you want your paper lantern to look like with the design criteria in mind.Will your paper lantern look like a traditional lantern, a fantastical beast, a star, or something else?
- Decide how you will light your lantern. Skip to step ten if you are using a battery-operated tea light. If you would like to build a simple lantern circuit that automatically turns on when it gets dark, follow the instructions in steps four through ten.Why might a lantern circuit that automatically turns on when it is dark and off when it is light be a nice feature?
- Build your circuit on the breadboard as shown in the picture.
- If you have trouble, or this is your first time using a breadboard, check out the How to Use a Breadboard for Electronics and Circuits page.
- Pay attention to which way the parts face. Certain parts cannot be backwards, or the circuit will not work.
- Do not switch the battery pack's red and black wires.
- In the picture, the LED's long leg is on the left, and the short leg is on the right.
- In the picture, the writing on the front of the transistor is facing towards you.
- If your circuit feels hot, or you see or smell any smoke, you have a short circuit. Immediately disconnect the batteries and double-check your wiring.
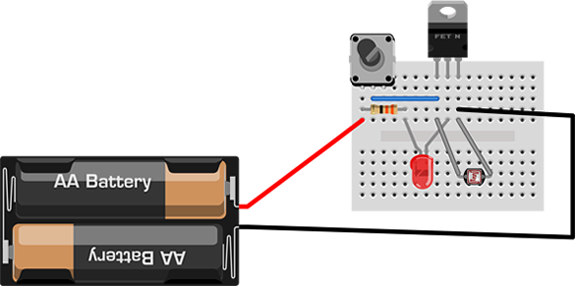 Image Credit: Ben Finio, Science Buddies / Science Buddies
- Turn the potentiometer's knob all the way clockwise. The LED should be off.
- Turn the potentiometer's knob all the way counterclockwise. The LED should turn on.
- If the LED does not turn on (or if the LED never turns off when you turn the potentiometer), double-check your circuit. If you still cannot find an error, ask someone else to look at it for you. Having just one part on the wrong breadboard hole will prevent the circuit from working. It can be hard to spot mistakes if you are new to working with breadboards.
- Turn the potentiometer's knob to roughly the middle position.
- You can quickly test your circuit by covering the tip of the photoresistor with your finger. You can also turn off the lights, or take your circuit into a dark room. When you do, the LED should turn on.
- Turning the potentiometer adjusts the light threshold at which the LED will turn on. Keep adjusting and testing your circuit until you get it just the way you like it.
- Gather materials to build the body of your paper lantern. When looking for materials, keep in mind these points:
- The body of your lantern must be strong enough to support the weight of your lantern circuit or tea light.
- At least some parts of your paper lantern must be transparent or translucent to let light pass through.
- If you are using the simple lantern circuit, the photoresistor must be accessible to the ambient light (the light in the room or outside space your lantern will be in) so that it can detect whether it is light or dark out.
Look at the sketch you made of your paper lantern. Can you identify which parts need to be opaque and which need to be transparent or translucent? List some materials you can use to get a transparent or translucent effect. - Build and decorate your paper lantern from the materials you gathered.
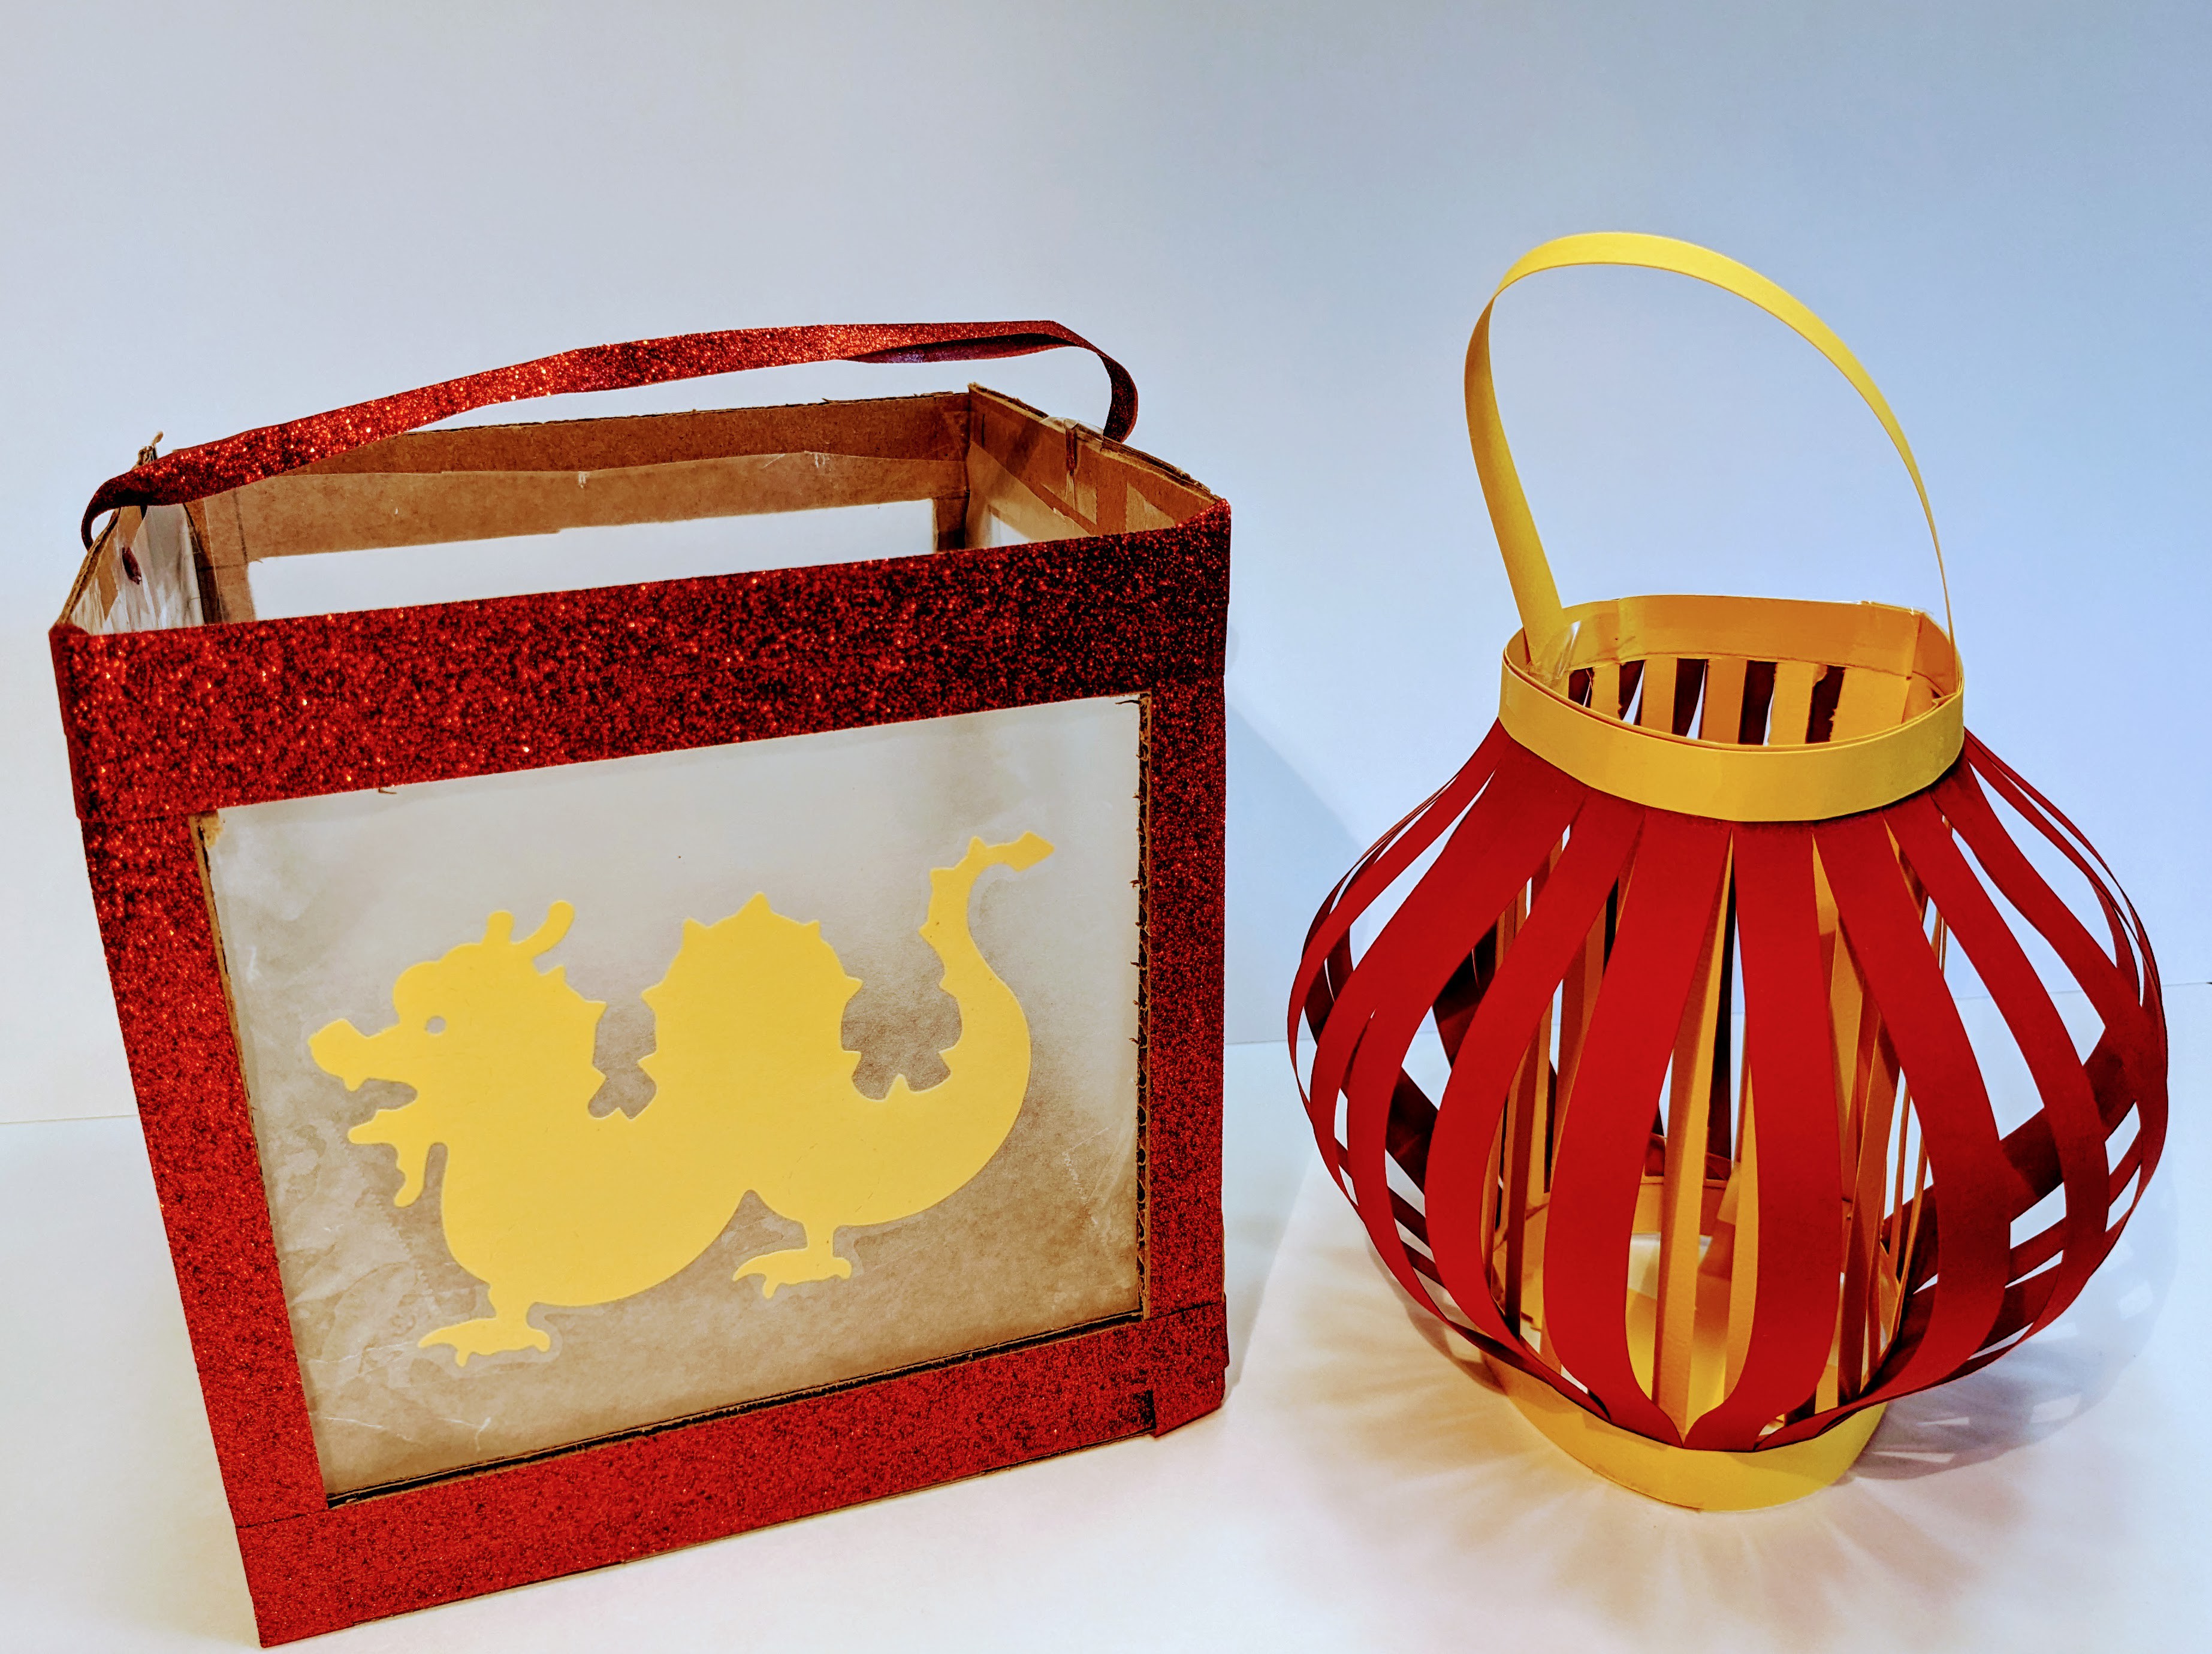
- Test your paper lantern. Does the light shine through it? Does it hold the tea light or lantern circuit securely? Can you easily hang it up or display it another way? Keep working on it until you are happy with the final results! Remember, engineers often design, build, and test several times until they make a good product.
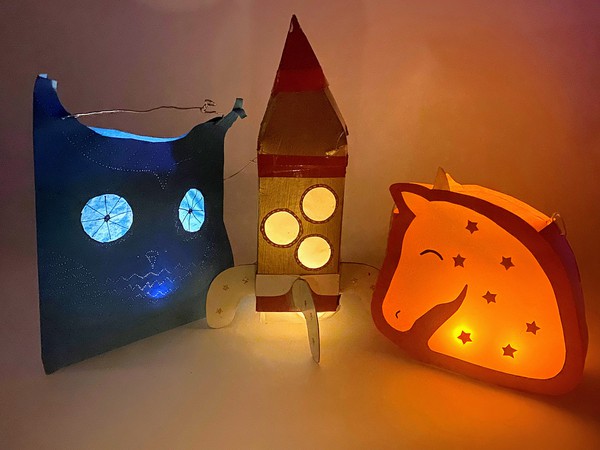 Image Credit: Science Buddies
What Happened?
While making your paper lantern, you went through the designing, building, and testing steps of the engineering design process. You may have had to do some or all of these steps several times before you ended up with a lantern you liked, and that worked well. This is called iteration and is something engineers do when making and improving products.
As you built and tested your paper lantern, you may have seen that the light was blocked by opaque materials like cardboard and construction paper. Cutting holes in the opaque material allowed light to pass through. If you tried covering those holes with translucent materials like wax paper, kite paper, or tissue paper, you saw that some light could pass through these materials, but it was dimmer and more diffuse than when the holes were uncovered.
If you built and installed the simple lantern circuit in your paper lantern, you saw that the photoresistor is the light-detecting part of the circuit. The other parts of the circuit (the potentiometer and the transistor) turn the LED on or off depending on how much light hits the photoresistor. This circuit is exactly like the circuits in automatic night-lights that you can buy at the store.
Digging Deeper
The simple lantern circuit includes parts you may already be familiar with, like batteries, LEDs, and resistors. The circuit also contains two special types of resistor, a potentiometer and a photoresistor, that have a variable (changing) resistance. You can change the resistance of a potentiometer by turning the knob. A photoresistor's resistance depends on how much light is hitting it. Its resistance goes down in bright light and goes up in darkness.
Another part of the circuit you may be unfamiliar with is the transistor. A transistor is like an electronically-controlled switch. It uses an electrical signal to turn the LED on or off. For a more detailed explanation of how the circuit works, you can watch this video:
Ask an Expert
For Further Exploration
- You can make a plug-in paper lamp instead of a battery-powered one. See this project for suggestions.
Related Resources
Project Ideas
Activities
Links
- Blog Post: 16 Science Lessons to Teach Circuits


