Summary
Overview
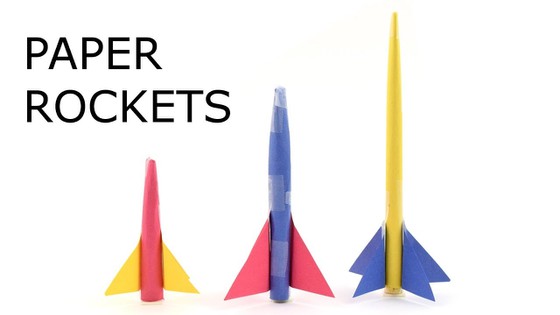
Do you need a fun, easy way to teach your students about the scientific method? Try this lesson that uses rockets made from nothing but paper, tape, and straws. An elementary school version of this lesson plan is also available.Learning Objectives
- Conduct background research and develop an appropriate hypothesis
- Design and conduct an experiment to test the hypothesis
- Draw conclusions from the results of the experiment
NGSS Alignment
This lesson helps students prepare for these Next Generation Science Standards Performance Expectations:- MS-Science Practices.
|
Science & Engineering Practices
Asking Questions.
Developing and Using Models. Planning and Carrying Out Investigations. Analyzing and Interpreting Data. Using Mathematical and Computational Thinking. Constructing Explanations. Engaging in Argument from Evidence. Obtaining, Evaluating, and Communicating Information. |
Disciplinary Core Ideas
The Disciplinary Core Ideas that apply to this project, if any, will depend on how students choose to focus their investigation.
|
Crosscutting Concepts
Patterns. Graphs, charts, and images can be used to identify patterns in data.
Cause and Effect. Relationships can be classified as causal or correlational, and correlation does not necessarily imply causation. Systems and System Models. Models can be used to represent systems and their interactions—such as inputs, processes, and outputs—and energy, matter, and information flows within systems. |
Materials
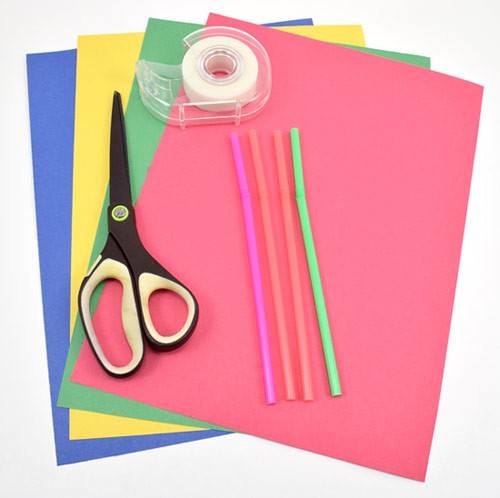 Image Credit: Ben Finio, Science Buddies / Science Buddies
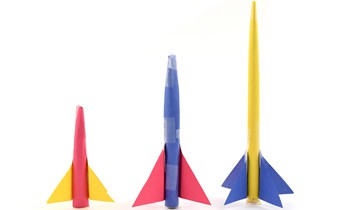
To make model rockets you'll need paper, scissors, tape, straws, and a tape measure.
- Paper
- Scissors
- Tape
- Drinking straws
- Tape measure
Background Information for Teachers
This section contains a quick review for teachers of the science and concepts covered in this lesson.This lesson is designed to guide your students through the steps of the scientific method (Figure 1) using a fun, hands-on project: paper rockets. You can read about the scientific method, or assign your students to read about it, in much more detail in this guide.
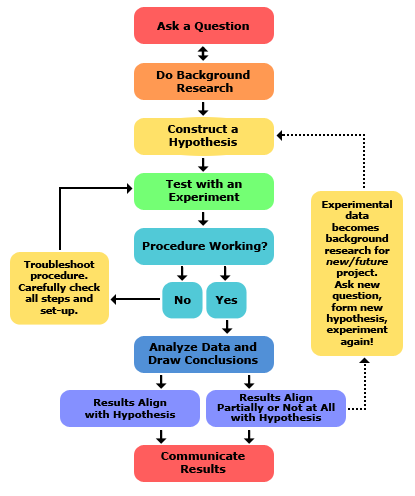 Image Credit: created by Amy Cowen for Science Buddies / Science Buddies
The scientific method starts with a question, then background research is conducted to try to answer that question. If you want to find evidence for an answer or an answer itself then you construct a hypothesis and test that hypothesis in an experiment. If the experiment works and the data is analyzed you can either prove or disprove your hypothesis. If your hypothesis is disproved, then you can go back with the new information gained and create a new hypothesis to start the scientific process over again.
Figure 1. Steps of the scientific method.
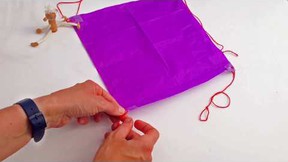
Your students will build small rockets out of paper and tape. The rocket fits onto a straw, and can be launched by blowing into the straw (Figure 2).
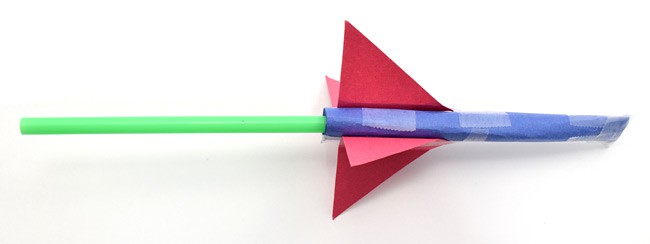 Image Credit: Ben Finio, Science Buddies / Science Buddies
Figure 2. Paper rocket.
Before doing this lesson with your students, it will help if you are familiar with some of the basic science concepts behind the paper rocket's flight. Depending on what variables students choose to investigate for their projects, they may need to do more research about some of these concepts. The references in the Additional Background section provide an overview of these concepts. Here are some potential points of confusion students may have:
- The directions of thrust, lift, drag, and weight. Lift and drag are defined based on the direction of the rocket's movement relative to the air. Drag is opposite the direction of motion, and lift is perpendicular to the direction of motion. Normally, this does not cause any confusion because we think about objects that fly horizontally (like a paper airplane), so lift points up. However, if a rocket is launched vertically, then lift points sideways and not up (Figure 3).
- Real rockets provide continuous thrust by burning fuel, which is expelled out the back end of the rocket. According to Newton's third law of motion (for every action, there is an equal and opposite reaction), since the fuel is pushed out the back of the rocket, the rocket must be pushed forward. This concept also applies to certain toy rockets, like model rockets, water bottle rockets, and baking soda/vinegar rockets, all of which expel some sort of fuel. However, the paper rockets in this project do not carry any fuel. They are propelled forward by one initial puff of air from the straw, but after that, do not produce any thrust on their own.
- The rockets have fins that, at first glance, might seem like they act like wings and generate lift if you launch the rocket horizontally. However, the fins are very small and their primary purpose is to keep the rocket stable and prevent it from tumbling—not to provide lift. See the "Rocket aerodynamics" reference from Science Learning Hub for more details.
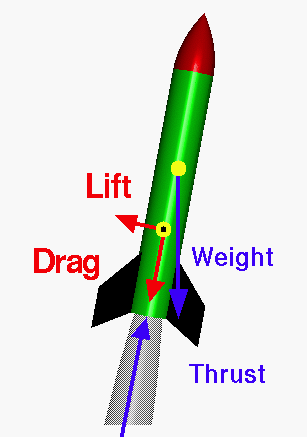 Image Credit: NASA / Public Domain
The thrust of the rocket comes from the gas being expelled and acts as a force that pushes the rocket upwards. The weight of the rocket has a force that pulls the rest of the rocket straight towards the ground. Drag is similar to friction and will act as a force opposite of the rockets direction of travel, and lift created by the air passing over the rocket body will create a force perpendicular to the thrust force.
Figure 3. The directions of lift, drag, weight, and thrust acting on a rocket (image credit NASA).