Scratch User Guide: Connecting & Using a PicoBoard with Scratch
Picoboard alternatives
Note: the Picoboard has been discontinued. If you do not have a Picoboard and are looking for a project where you can make electronics interact with the physical world, check out our Arduino and Raspberry Pi projects instead. They can accomplish all of the same things as the original Picoboard, and much more!
The Picoboard was a piece of hardware you could plug into your computer's USB port. It let your Scratch programs interact with the outside world using data from sensors, for example, by reacting to light or sound. While the Picoboard has been discontinued, we have kept this page up for archival purposes and in case anyone needs instructions for doing a project with a used Picoboard. The instructions below were written for Scratch 1.4, which you can still download from the Scratch 1.4 download page. The Picoboard will not work with newer browser-based versions of Scratch.
What is the PicoBoard?
The PicoBoard is a piece of hardware called a sensor board that can be combined with MIT's Scratch programming environment to allow your Scratch programs to react (and even respond) to events happening outside of the computer. (If you're unfamiliar with Scratch and would like to learn more about it, read the Science Buddies Introduction to Scratch page.) A sensor is a device that detects (senses) and measures the presence or absence of something. The PicoBoard is actually made up of several different types of sensors so it can detect many different "somethings," including sound and light. The PicoBoard allows you, the user, to interact with Scratch programs. The action that you see on screen depends upon the sensor(s) that you are using and the duration and amount of "something" that the sensor detects. You can do some pretty cool things with the PicoBoard. For example, you can use the slider to make your sprite slide across the screen, press the button to make the sprite jump, or use the sensors at the bottom of the board to measure resistance and make an on-screen instrument. You can also use two sensors at once to make a sprite jump and slide at the same time! For more examples of what you can do with the PicoBoard, see the SparkFun Electronics PicoBoard web page.
Where do I buy the PicoBoard?
Since it has been discontinued, you can no longer buy a new Picoboard. You may be able to find used Picoboards online.
How do I install the PicoBoard?
- Once you have a PicoBoard, you're ready to install it and start trying it out. Here are some step-by-step tips on getting it set up to work with your computer. You might want to ask someone who is experienced with downloading and unzipping files to help you with the computer setup. Also note that you should have permission from the computer's owner to download drivers onto the computer for your science project.
- Open the package. The package comes with one PicoBoard and four alligator clip cables. The alligator clip cables connect to the inputs at the bottom of the board, which can be used to sense electrical resistance in a circuit.
- The PicoBoard has many different sensors that allow the user to interact with the program on his or her computer screen. Figure 1 shows the different sensors on the PicoBoard. The light sensor allows you to have your sprites respond to shadows passing over the sensor. Your sprites can also respond to sound, to the slider moving, and to pressing of the button.
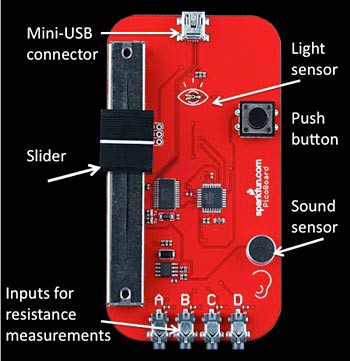 Image Credit: SparkFun Electronics
A red picoboard is displayed vertically and has a small usb connector at the top. A slider covers the entire left side of the board and four terminals line the bottom of the board. Directly under the usb connector is a light sensor, while a push button and sound sensor are found on the right side of the board.
Figure 1. This figure shows the different sensors on a PicoBoard that allow you to interact with your Scratch program.
- The first step in using the PicoBoard is to download the drivers so that your computer can communicate with the PicoBoard. Follow the instructions in the "Install FTDI Driver" sections of this document to install the drivers.
- On this page, you will be asked to identify the PicoBoard that you have so that you can download the correct drivers. Click on the image of the PicoBoard you have.
- Follow the instruction to download the correct drivers. If you are using a Windows-based computer, download the drivers for Windows. If you are using a Mac, download the drivers for Macs. Save the downloaded file to a file on your computer that you should name Scratch.
- The downloaded drivers file is a compressed file (the image has a zipper on it). Left-click on it and choose Extract all from the drop-down menu.
- The extracted file will not have a zipper on it. Open the file. The drivers are contained within this file. Click on the drivers icon.
- Once the drivers have been saved to the proper location, test your PicoBoard. Connect the USB cable to your computer and to the PicoBoard. The PicoBoard's USB connector is located at the top of the board.
- Open Scratch on your computer. Click on the Sensing category, located at the top left. You will see the sensing blocks listed on the left side of the screen.
- Click on the gray box in front of the slider sensor value block. Click and drag the block into the Scripts area. You should see a counter on the stage that says slider sensor value with the value.
- Click on the gray box in front of the sensor button pressed? block. Click and drag the block into the Scripts area. You should see a counter on the stage that says sensor button pressed? and the status.
- Move the slider on the PicoBoard up and down and see if the value shown on the stage changes.
- Press the button on the PicoBoard and see if the status on the stage changes from false to true.
- If these actions occurred, then your PicoBoard is ready for use. If not, then you will have to investigate whether you have the correct drivers in place. Have a person that is knowledgeable about installing software on computers or who has successfully downloaded software from the Internet help you troubleshoot this.
How many sensors are there and how can I use them?
Now that you have the PicoBoard set up correctly, you're ready to start playing with it. The sensor table describes each sensor, how you can use it, and the Scratch blocks that you could use to capture and use the sensor information.
| Sensor (refer to Figure 1.) |
Action | Scratch Blocks |
|---|---|---|
| Button | Your sprite can be programmed to react when you push this button. Make your sprite jump or change colors. When you stop pushing the button, the sprite will go back to its original state. | 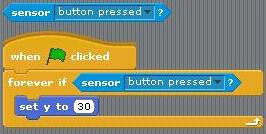 Image Credit: Scratch, MIT Media Lab / General Public License Image Credit: Scratch, MIT Media Lab / General Public License
|
| Sound | Your sprite can be programmed to react when this sensor detects sound. For example, a sprite can jump up in surprise if you yell into the sensor, but perhaps not do anything if you simply whisper into the sensor. Try to keep background sound to a minimum when using this sensor. | 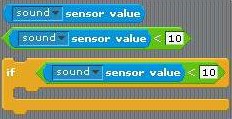 Image Credit: Scratch, MIT Media Lab / General Public License Image Credit: Scratch, MIT Media Lab / General Public License
|
| Light | Your sprite can react to light or shade using the data coming from this sensor. One of the examples in Scratch uses the light sensor in an interesting animation of the Sun. | 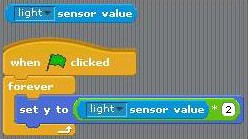 Image Credit: Scratch, MIT Media Lab / General Public License Image Credit: Scratch, MIT Media Lab / General Public License
|
| Slider | This sensor is useful because instead of being a binary sensor, like the button sensor (which turns on or off), this sensor changes continuously on a scale from 0 to 100. | 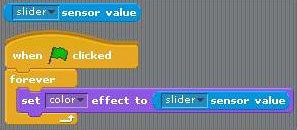 Image Credit: Scratch, MIT Media Lab / General Public License Image Credit: Scratch, MIT Media Lab / General Public License
|
| A, B, C, D (used with alligator clip cables) | These sensors monitor the resistance between the alligator clips of its cable. If you connect all four cables, you can monitor the resistance of four different items. | 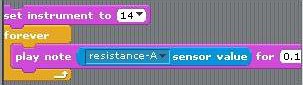 Image Credit: Scratch, MIT Media Lab / General Public License Image Credit: Scratch, MIT Media Lab / General Public License
|
- Click on the gray box in front of the sensor blocks to monitor the sensor values while your program executes. Figure 2 shows how you can see the sensor values on the screen.
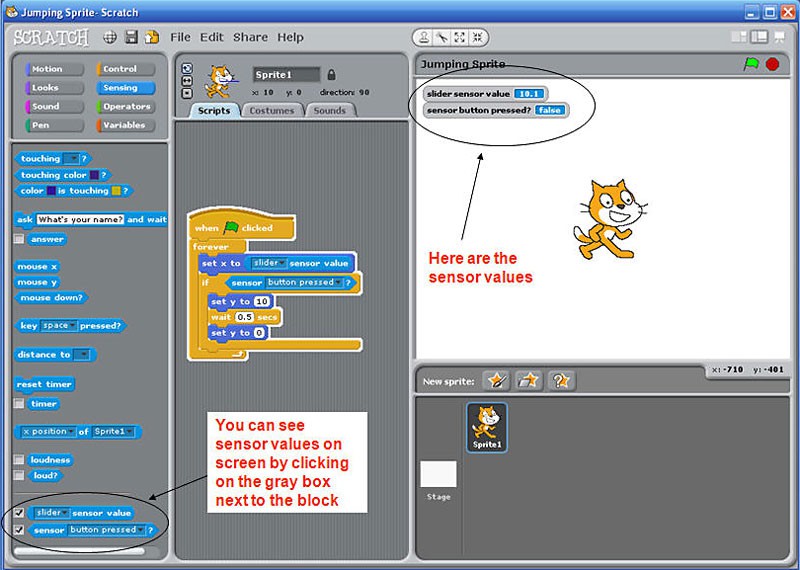 Image Credit: Scratch, MIT Media Lab / General Public License
Screenshot of a picoboard sending information into the program Scratch. The program Scratch can connect to a picoboard and display input values from the picoboard onto a window in the top-right of the program. Sensor values appear at the bottom-left of the program in a sidebar and can be toggled to show the values in the sprite window.
Figure 2. Screenshot of a Scratch program that uses a PicoBoard.
- Click on the following link to download an example of a Scratch program that works with a PicoBoard. The sprite in this simple Scratch and PicoBoard example jumps and slides when the button and slider on the PicoBoard are employed.
- To see more programming examples, check out the Sensors and Motors examples in Scratch. You can access these examples by opening Scratch and then clicking on the word "File" near the top left of the screen. This opens a menu of options. Choose Open from the File menu. Click on the Examples button on the left panel and then open the Sensors and Motors folder. Inside are several Scratch projects that use the PicoBoard. Double-click on one to open it. Remember, to see the programs working, you need to have a PicoBoard installed.
Science Buddies Scratch Resources
- Scratch User Guide: Introduction
- Scratch User Guide: Installing and Getting Started with Scratch
- Scratch User Guide: Adding Images and Sprites to a Scratch Program
- Scratch User Guide: Connecting and Using a Picoboard with Scratch
- Scratch User Guide: Help, I'm Stuck! Troubleshooting a Program in Scratch